Search the BCSS Manual
Quick Start
Installation
- Choose the correct download link:
Download Intro Download Deluxe Download Diamond Download Virtual - Save the file. (Don't run it.) Note where the browser places the downloaded file (in your Downloads folder).
- Ignore/close browser and anti-virus warnings.
- When the download finishes:
- Chrome: Double click on the rectangle in the very lower-left corner of the browser window. Can't see it? Maximize the window.
- Internet Explorer/Edge: Choose Run.
- FireFox: Click on the Download Arrow in the upper-right corner and click on the bcss download file.
- Follow the prompts to install.
- Windows may reboot. When the computer comes back up, allow the file named GI**** to run. (It's a temporary file used by the installation software (Ghost Installer) to install BCSS. The **** will be any combination of letters and numbers.)
- Right click on the desktop icon for starting BCSS.
- Select Properties.
- Click on Advanced.
- Check 'Run as Administrator'.
- Save.
- In BCSS, click on Utilities (upper-right) then Restore Data.
- To load sample data, point to 'C:\BCSS\sample db' and click Save.
- To restore data, point to the folder containing the last data backup and click Save.
- Go to the Control Panel and turn off User Account Controls. (video
)
BCSS Intro Edition
These are the differences between Intro and Deluxe, Diamond and Virtual
- Intro's price is $295 (a one-time payment) without the 30-consignor limitation.
- With any edition of BCSS prices are one off and there are no annual support fees. Ownership of the copy of the software purchased is passed to the purchaser for lifetime use. (The software cannot be transferred to anyone.)
- Inventory is entered in Intro only at the time it is sold, so there are no records of unsold inventory, no automatic discounting of aged inventory and no reports about unsold inventory.
- Intro only supports the use of a laser or dot-matrix printer. Deluxe or higher is needed to use a cash drawer, receipt printer or bar-code scanner. Diamond and Virtual support thermal label printing and networking.
- Price labels may be printed by entering items in a table in Intro, but the entries are not saved. Reprinting any label requires reentering item information. Price and address labels, consignment agreements, receipts, sales/settlement/disbursement reports and checks can be printed using any standard ink or dot matrix printer.
- Intro doesn't support the use of barcodes or a listing of unsold items so at POS each item must be entered manually (as opposed to selecting an item from an item list, entering an Item ID or scanning a barcode).
- These features are not included in Intro: buyer fee, buyer records, consignor online access to inventory and balance data, data import/export, employee management, QuickBooks data export, disbursement records and reports, house accounts, client and inventory pictures, layaways, networking computers, rental sales, sale on hold, sales promotions, split POS payments, thermal price labels, wish lists.
- The 'Training Panel' in Intro is replaced in Deluxe, Diamond or Virtual with handy Quick Links (which bring common functions and important information to the surface in the software's User Interface).
- BCSS Deluxe, Diamond and Virtual support the use of certain cash drawers and receipt printers. Any barcode scanner is acceptable.
- Diamond and Virtual support networking (connecting 2 or more computers to share the same database simultaneously), thermal label printing, records and management of employees, records (with demographics) of buyers (who make purchases) and wish lists.
- BCSS Virtual allows consignors to add their inventory and view account balances online and it is directly integrated with QuickBooks.
- Credit card transactions can be processed completely outside of BCSS so any card processor can be used. Just select the type of card that was used as the payment method at POS.
Intro Quick Start Guide
The following steps are for BCSS Intro. For Deluxe, Diamond and Virtual go to BCSS Quick Start.
| 1 |
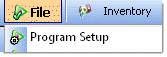
Enter shop Information & tell BCSS about your business, including which printers to use. Click on File then Program Setup. Click on the colored tabs to view setup screens. |
 |
| 2 |
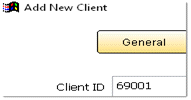
Add a Consignor (F2) Enter as much or as little information as you. Mark records to receive mailings. Set Consignor %, what to do with unsold items... |
 |
| 3 |
Press a button. BCSS auto-fills the Agreement with shop/consignor information - then print! |
 |
| 4 |
Click on Labels > Price Labels. Enter items and click OK. Make sure your printer is working with BCSS before making several entries. |
 |
| 7 |
Make a Sale (F6) Enter each item for the Sales Invoice and use Preview and Print, or Save. |
 |
| 8 |
Make a Settlement (F7) Settle for one Consignor or use Batch Settle to process several settlements at once. |
 |
| 9 |
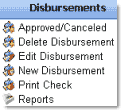
Use the New Disbursement option in the Disbursements menu to prepare and print checks or make other types of payments. |
 |
| 10 |
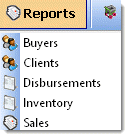
Create Reports Click Reports and choose a report. |
 |
Print Address Labels for Clients
See instructions for printing address labels.
BCSS Intro Inventory
In BCSS Intro, inventory is entered at the point of sale, not before. Discounts and Payment Methods (Cash, Credit Card, Gift Certificate, etc.) may also be entered at that time.
Not pre-entering inventory saves time but aged inventory can't be batch or auto-discounted and a price label can't be reprinted without reentering the item. (BCSS Deluxe, Diamond and Virtual do store inventory records. Labels can be reprinted. Items can be batch entered and edited.)
Shop Inventory includes:
- Consigned items - Items provided by consignors
- Resale items - Items owned by the shop (sold through the Transfer Account)
- Donated items - Unsold items donated to the shop
Processing New Inventory Items
When a Consignor brings new items into the store, use current shop methods for tagging items or use BCSS to print stick-on price labels. These labels may be applied to hang tags for items that aren't suited for sticky labels.
Please refer to Intro Price Labels for details.
To print price labels with BCSS Intro -
In Intro click on Labels.
Select Price Labels Help for detailed instructions.
Selling Shop-Owned Inventory
A 'Transfer Account' is an account for the shop (the 'house') used to sell shop-owned inventory. Just set up a Consignor account for the shop using the shop's information.
Important: Enter a 1 (not 100) in the Consignor % field when setting up the Transfer Account. (1 = 100%; 100 = 10000%)
Consignor Credit Sale
A Consignor must have a credit before making a credit purchase. Clients obtain a credit by accepting store credit for sold items.
Create a store credit by settling sold items for credit.
See Settle One Consignor.
Process a Consignor Credit Sale
Select Consignor from the Main Table then select Credit Sale from the Clients Menu.
The New-Sale Screen will open with the Consignor's information entered and the amount of credit listed in 'Paid' field:

See New Sale for the remainder of the sales process.
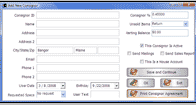
Intro - Process a New Sale
- Press F6 to open a blank sales invoice. 'Cash Sale' will appear in the 'Bill to' field and may be replaced by the Buyer's name. Enter as much buyer information as desired.
- A (yellow) line will appear in the grid for item entry.

The Item ID will be entered by BCSS when a Consignor is chosen in the Consignor ID field.
- Click in the box below 'Description' and enter a name of up to 20 characters for the item.
- Enter price and quantity.
- Click in the Consignor ID box. A down arrow will be presented. Click on the arrow and select a Consignor (the owner of the item):
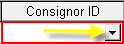
Note that when the Consignor is selected, the item will be assigned an ID which will be the Consignor ID like 'Keen-2' which would indicate that the item is Consignor Keen's 2nd item.
If other items are to be added, select Click to Add Another Item and repeat the entry process:

- Remove an item by clicking on its line and pressing:
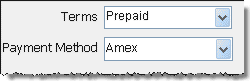
- By default the Terms and Payment Method are set as Prepaid and Amex (American Express). Change these as needed:
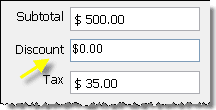
- Sub totals and tax will be computed and displayed. Discounts may be entered here:
- Enter the amount paid:
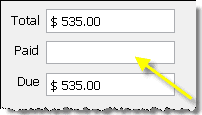
- The Due field will change to reflect the amount of change due to the buyer:
In this example, the total sale was $535. The amount paid was $540. Change due is $5.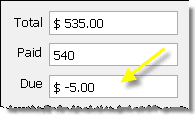
- Preview and Print
- When all items have been entered, click Preview and Print to view the invoice on screen in a print preview:
- If no preview or print is necessary, use the Save button to save the invoice:

- On rare occasion it may be necessary to force a calculation. To do so click:

- Use the close button to close an invoice without saving it:

Settlements - Finalizing Consignment Sales
Shops 'settle' with consignors (usually at month end), providing the consignor with payment and a report of items sold.
BCSS automates settlements by computing the shop's and consignor's shares, crediting their accounts, preparing a settlement document for printing and totaling payment due each consignor.
Processing Settlements (F7)
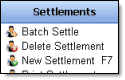
1. Press F7 or click on Settlements in the Work-Areas Menu.
2. Select New Settlement:
3. Select a Consignor to open the New-Settlement Screen.
4. Check items to be included in the settlement.
5. Enter any additional amounts or deductions.

6. Enter notes for the Consignor or for the shop.
7. Click 'Save and Exit' or 'Save, Print, Exit' to print.
Unchecked items will appear the next time the Consignor is chosen for settlement.
The total settlement due is automatically calculated and entered.
A Settlement # is auto-created and displayed in the Settlement # field.
Batch Settlements
See Batch Settlements.
Negative Number on Settlement Screen
Intro does not track inventory, so when an item is sold and subsequently returned for refund or exchange, Intro will display a 'minus one' (-1) on the New-Settlement Screen. This number has no effect on final calculations.
New Features
![]() Each time a work area in BCSS is accessed the computer takes a little time to load data for that work area into RAM memory. Going to another work area and coming back to the loaded work area should then be nearly instantaneous.
Each time a work area in BCSS is accessed the computer takes a little time to load data for that work area into RAM memory. Going to another work area and coming back to the loaded work area should then be nearly instantaneous.
The program is tiered in features and price so startups and small shops can acquire basic functions without having to purchase unwanted features.
- Intro is a simple POS program with basic reports that doesn't track unsold inventory. Price labels can be printed.
- Deluxe adds inventory management and supports the use of QuickBooks, cash drawers, receipt printers and barcode scanners. The primary difference is that labels and tags are printed with an ink printer and sheets of labels and tags (or plain 80# paper).
- Diamond adds support for networking, thermal label printers, employee management, mall-space rental and buyer records.
- Virtual provides online features: Clients can view their account information online and add inventory online (for downloading at the shop).
All of the following features are included in BCSS Diamond and Virtual. Several are included in BCSS Deluxe. None are included in BCSS Intro.
Batch Functions - Batch edit or delete inventory by category, client and/or date. In Program Setup on the client page, enter a city, state and/or zip to have that information appear each time the new-client record is opened.
Batch Transfer Manually to Transfer Account - Select multiple aged inventory items from different consignors and categories and move them to the Transfer Account at once.
Buyer Fee - Deduct an amount from sales proceeds per item before splitting with the client. (This is part of an optional module ($19.95/mo) that includes passing credit-card charges on to consignors and buyers.)
Buy Outright - Buy items from individuals and record information about sellers, items and transactions, including buy prices. In BCSS use Batch Buy Outright and select 'Process BO Settlement Now' to settle with sellers and print price labels.
A Google calendar can be accessed under Help.
Consignment Agreement may be edited within BCSS (Utilities, Edit Consignment Agreement). Copy/paste is allowed.
Credit-Card Charges can be passed on to consignors and sellers (where allowed) to recover some or all of the cost of accepting credit cards. (This is part of an optional module ($19.95/mo) that includes deducting a 'buyer fee' before splitting with the client.)
Credit-Card Processing is not integrated with BCSS (so any card processing service may be used). A separate module may be added which allows deducting a set percentage from settlements of credit-card sales only, and/or adding a set % to credit-card sales, and/or deducting a set percentage from all sales prior to applying the consignor split.
Credit Limit Displayed at POS - The amount of credit set in the Buyer Record appears automatically when processing a new sale (for reference only).
Credit Purchases Deducted Automatically from Client Balance
Discount after Transfer to House - Items may be auto-transferred to store ownership and auto-discounted after the transfer.
Discount by Category - Any inventory category can have its own aged-inventory discount schedule.
Disposal Codes - Some store owners don't want buyers to know how unsold items will be disposed. Price tags can be printed with Disposal Codes for Destroy, Donate or Return. Store Employees will know the codes but buyers may not. The codes may be changed periodically to maintain secrecy. Set the codes in Program Setup (Inventory).
Employee Permissions - Allow or deny each employee access to BCSS areas in Point of Sale, Back Office and Management.
Full-Screen Display Check this setting in Program Setup (General tab) to maximize BCSS screens.
Import/Export Client and Inventory Records from/to spreadsheets. Import/Export Buyer Records using BCSS Diamond or Virtual.
In Dates, Barcodes, Disposal Codes and Discount Schedules on price labels
Inventory Classification - Use Inventory Groups and Sub-Groups to make Inventory Classification easy and exact. Four Groups are available, They can be named anything and each can have unlimited Sub-Groups. For example, a Group might be 'Manufacturer' and its Sub-Groups might be 'American', 'Ashley', 'Broyhill', 'Bush', 'LazyBoy', etc). Then, when adding or editing an Inventory Item, the Manufacturer can be selected from a List of Manufacturers.
Inventory List for One Client - View or print a list of inventory for one client.
Mailbox Feature: Mark individual consignors with notes of action to take at a later time and/or print and mail letters to consignors. (In BCSS, select a Client, Edit, Mailbox; or right-click on the client and select Edit Mail Box.)
Non-Tax of Clothing Items below $50 - Any clothing item sold for under $50 will not be subject to tax on the sales invoice. This includes items that may have been priced over $50 and subsequently reduced to under $50 from automatic or manual discounting. (Originally designed for stores in Connecticut)
Pictures! - Add a picture (stored locally or online, no larger than 620 x 700 pixels) of any inventory item or client.
QuickBooks is directly integrated with BCSS Virtual. Data can be exported from BCSS Deluxe and BCSS Diamond and imported into QuickBooks.
Reminders - Be alerted to contact patrons (on a specific date or when they come into the store) and have notes for reference.
Reports Added
- Inventory Report: Returned, Donated and Destroyed Items - Generate, view and print records of such items. When generating a report, on the Inventory Report page, select options from the drop-down menu named Disposition.

- Disbursements Report: Payments to One Client - On the Disbursements Report page, select the client from the drop-down and set other filters to refine the search results.
- Clients Reports: 'Positive Store Credit' and 'Negative Store Credit' on the Clients Report page.
Retail Sales capabilities for recording retail-items purchases from businesses (vs individuals), processing sales, calculating profit/loss and producing reports.
Right Click - Select an item in the list of consignors, settlements or sales then RIGHT-click on the selected item for a menu of functions like edit, delete, etc.
Search Records -
In November, 2013 (version 6.0.850) the search boxes were replaced by a new search function. Watch a video
Settle and Pay One Client - No need to wait for 'batch settlements' and 'batch payments'.
Sort Records Columns with letters and numbers will sort as text. The order of numbers will be 1,10,2, not 1,2,10.
To sort records, click on headers. In the Inventory Work Area, for example, click on ID1:
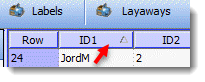
Click the header again to reverse the sort order.
To sort order ID1 then sort ID2, sort ID2 first then hold down the shift key and click on the ID1 header.
Taxes- Multiple taxes may be applied to each item and items can be made non-taxable or non-taxable below a stipulated amount. For example, a clothing item price below $50 is not taxable in Connecticut.
Undelete Inventory - Restore the record of Inventory Items that have been deleted.
User Date- Mark client records with a specific date then view or print a list of consignors for that date only.
User-Defined Inventory Groups - Inventory is 'categorized' by designating a 'category' for each item. Set up Groups (like color, size, style and brand) and Sub-Groups (like red, green, blue and white, for color) for each category and select from those options when adding or editing an inventory item. UDGs are useful for grouping and finding inventory.
User Text can be any text added to a client or buyer record to uniquely identify the person. The text might be a single word (like 'best'), then a list can be generated to only include those persons.
| Function | Function Key |
|---|---|
| Manual - User's Guide | F1 |
| New Client Screen | F2 |
| New Inventory Screen | F3 |
| New Layaway | F4 |
| New Rental | F5 |
| New Sale | F6 |
| New Settlement | F7 |
| Inventory Entered Today | F8 |
| Today's Recap | F9 |
| Sold Today | F10 |
| Settled Today | F11 |
| Hidden - Opens cash drawer | F12 |
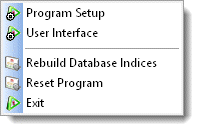
Program Setup
(Some of the following features are not included in Intro and Deluxe. See Compare BCSS Editions.)
To access Program Setup, click on File:

Select Program Setup:
Program Setup has tabbed windows named General, Clients, Inventory, Mall, Networks, Printers, and Sales. (Mall and Networks are BCSS Diamond and Virtual features.) Click on each colored button to access the corresponding page. The selected button's background color will turn to yellow.

Information entered on these screens 'configure' BCSS for your business. BCSS will use the information to auto-complete forms, compute consignor splits, taxes and discounts, and perform many other operations specific to your business.
Completing Program Setup will also introduce you to several BCSS features.
Select the General Tab. 
Each time BCSS is started, it can open in the Clients, Inventory or Sales Work Area. Select one. Sales is most commonly selected for PCs on the sales floor. Clients and Inventory are selected for back-office computers used to enter inventory, print labels, process settlements, print checks and to communicate with customers.
Enter the store's information.
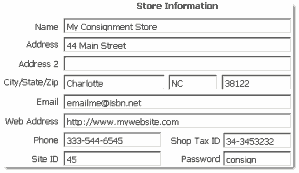
Store information entered here will be auto entered on Consignment Agreements and Sales Invoices.
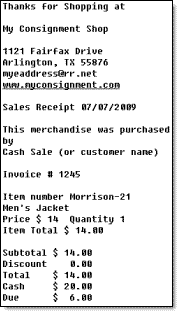
Any string of 50 characters or less entered in the Email and Website fields will appear on 3" sales receipts. Messages like 'All Sales Final' or 'Thank you!' could be used.
A Site ID and Password will be issued upon purchase to remove the 2-week demo time limitation.
QuickBooks (Deluxe, Diamond and Virtual)
Data can be exported in QuickBooks format then imported into QuickBooks. When transferring data for the first time, check 'All Data' to export or transfer all data from BCSS to QuickBooks then remove the check for subsequent transfers.
BCSS Virtual is directly integrated with QuickBooks. For Virtual, enter the name of the company used in QuickBooks and use Find File to locate the company name.
Select the date format used in your country. In the U.S. the default option mm/dd/yr.
Change the currency symbol if desired.
Select a check-printing format: one-per-page or three-per-page. Three is most common (because fewer sheets of checks will be used). With one check per page, settled items can be printed on the memo portion of the check.
Inventory Quantities (Deluxe, Diamond and Virtual): Some items (palets, barrels, etc) may be inventoried in fractional amounts. Check the box to enable decimal values for inventory.
Every sold and unsold item appears by default in the list of Inventory. Check Zero Quantity in Inventory Work Area List to NOT display inventory records of items not in stock (quantity = 0).
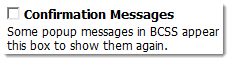
Confirmation Messages
BCSS has several helpful one-time messages intended to assist first-time users. Check this box to make those messages appear again.
Automatic Daily Data Backup takes place at the time set:

Two minutes prior to the time set, an alert will appear to allow time to finish work in progress before the backup begins.
On a network, the backup should only occur on the host computer. On remote computers set the time for 25:00 so backups will never take place.
Backups should be made on an external storage device. See Data Backup.
Click Save to save settings and continue in Program Setup:

Click Save/Exit to save settings and exit Program Setup:
Close/reopen the program and view this page again to make sure the changes were saved. If they weren't saved, Windows' 'User Account Controls' is blocking. See this video to correct the issue.
Select the Clients Tab. 
Default City and State
The city and state entered will be auto-entered each time the new-consignor screen is opened so as to avoid repetitious entry of the same information. A different city and/or state can be entered on the new-consignor or edit-consignor screens.
Default Client (Consignor) Percentage on Sales
Enter the most common percentage consignors receive. The Default Client % will be auto-entered in the Consignment Agreement, the New-Inventory and New-Client Screens. The % may be changed for each client, inventory item, category or sale.
![]() % Bonus for Store Credit Settlement - Grant a bonus at settlement store-credit settlement. Set the bonus amount in decimal form (.05 = 5% for example). When 'Credit' is selected as the settlement payment method on the settlement screen, the bonus will be displayed and applied (and can be changed). (not available with batch settlements)
% Bonus for Store Credit Settlement - Grant a bonus at settlement store-credit settlement. Set the bonus amount in decimal form (.05 = 5% for example). When 'Credit' is selected as the settlement payment method on the settlement screen, the bonus will be displayed and applied (and can be changed). (not available with batch settlements)
Minimum Client Settlement
Enter a dollar amount (without a dollar sign) to avoid processing settlements for less than the amount entered.
Minimum Days Between Settlements
Enter a number of days to avoid paying more often than the number of days entered. (This setting only affects Aged Batch Settlements. Leave Minimum Days set to zero to settle only for sales in the previous month and earlier.)
Check Fund buy outrights with the Store Credit balance of this house account to have sales proceeds from the sale of your own personal and retail items used to purchase buy-outright items.
Check Hide Batch Settlements and Hide Percentage Tool to not display those options in work-area menus. (The intent is to prevent their accidental or unsupervised use.)
Check Include Layaways in Settlements if such is desired.

Any consignor record can be marked as inactive and excluded from lists and reports if this box is NOT checked:

Check the box to print items sold on settlement vouchers.

Enable Resale & Police Reports is available in BCSS Diamond and BCSS Virtual for jurisdictions requiring police reports.
Transfer Account
Unsold items may be transferred to shop ownership (to the 'Transfer Account'). Otherwise they may be 1) returned to the owner 2) destroyed or 3) donated to charity.
To sell items owned by the shop, create one or more client accounts and set the Client % to 0. Proceeds from all sales will go to the shop account. The 0% will let the program know to NOT create settlement records for such accounts.
To auto transfer unsold consignments to the Transfer Account -
- Click on the Inventory Tab (above).
 On the Inventory Screen, under Aged-Discount Schedule, complete all fields for a Discount Schedule and enter a number of days after which unsold items will be transferred to the Transfer Account, then return here to the Clients Screen.
 - Check 'Enable the Transfer Account?'
- When adding or editing Consignor Records, enable this option for a specific client by selecting 'Transfer To House' for 'Unsold Items'.
- At the top select Sales, Apply Discounts. (Any unsold inventory eligible for transfer will be transferred.)
For details see Transfer Account.
Click Save to save settings and continue in Program Setup:
Click Save/Exit to save settings and exit Program Setup:
Close/reopen the program and view this page again to make sure the changes were saved. If they weren't saved, Windows' 'User Account Controls' are blocking. See this video to correct the issue.
Select the Inventory Tab.  (Deluxe, Diamond and Virtual - Inventory is entered in BCSS Intro when it is sold.)
If inventory pictures will be used, store them in one folder (on the computer, an external drive or on the Internet, no larger than 620 x 700 pixels) and enter the path to the folder (like C:\images or http://www.mywebsite.com/images) in the field named Default Picture File Location. (Use the 'Find Location' button to navigate to the location.)
When a picture is being added to an inventory record, BCSS will open the default folder to avoid your having to 'find it' each time.
Selecting a Default Category will auto-input the selected category when adding new inventory (to avoid repetitious reentry of the category). Use the drop-down arrow to the right of Default Category to select a category.

If no categories appear in the list, click Save/Exit to save changes and close Program Setup. Select Inventory on the Main Menu, then Categories. Enter a category name (for the Default Category) in the box at the bottom and click Create New Category at the top. Click Save Changes then Exit.
Return to Program Setup, Inventory and select a Default Category.
 When entering inventory, enter several items in the same category, if possible. Before entering them, change the Default Category to the category of the items being entered. This will also facilitate matching printed labels with items entered.
Price-Label-Printing Options
Bar-Code Symbology determines if barcodes are to be 7 (UPC-E) or 11 (UPC-A) digits. BCSS prints and reads UPC-A. (Intro doesn't utilize barcodes.)
Some scanners must be calibrated to produce 11-digit codes from 12-digit scans. See the scanner's user's manual for calibrating (which usually involves scanning a code in the manual called the 'Cut Digit Code' which tells the scanner to 'cut' the last digit of a 12-digit code.
When the new-sale screen opens, the cursor will be in the bar-code field ready for scanning. If the bar-code number appears and the line is populated with the information about the item but it's necessary to press Enter to complete the scan, then look in the scanner's manual for another code to add a 'line break'.
If all transactions are Buy Outright, check 'Process all new inventory as buy outright'.
Check 'Print BO (buy outright) Agreement and Item List on a single page' if preferred.
Aged-(Inventory) Discount Schedule
Deluxe, Diamond and Virtual can discount unsold inventory according to the discount schedule(s) defined here. There can be multiple discount schedules and each can be assigned to a category, allowing very specific discounting of merchandise.
Set the number of days and the amounts of the discounts to be applied.
Click 'Save Schedule' to save settings.

If a fixed price is to be set for items transferred to the Transfer Account, enter the amount under the Schedule. Here $1 is entered as 1.00.

If there's more than one House Account and discounts are to apply, check 'Apply discounts to extra house accounts'.
Check 'Process discounts and transfers automatically' if applicable.
Discount after Transfer to House - Items may be auto-transferred to store ownership then auto-discounted after the transfer.
Click Save to save settings and continue in Program Setup:
Click Save/Exit to save settings and exit Program Setup:
Close/reopen the program and view this page again to make sure the changes were saved. If they weren't saved, Windows' 'User Account Controls' are blocking. See this video to correct the issue.
Select Printers Tab. 
There are 3 sections on this page:
1. Ink Printer
Choose a printer to print on 8.5" x 11" paper (including consignor agreements, address and price labels on sheets of labels, reports, and receipts).
If the printer is not listed in the drop-down menu, install the printer driver (software). (Please refer to the printer's manual and installation CD, the manufacturer's or seller's website, or search Google for 'printer driver' plus the make and model of the printer.)
2. Thermal Receipt Printer
BCSS is configured to work with the POS-X line of receipt printers. Other printers 'might work' but printers purchased elsewhere, used/refurbished printers and other makes/models are not recommended or supported.
'Thermal' refers to a type of print technology. Where ribbon printers transfer ink from a ribbon to paper, thermal printers use heat (from a thermal printhead) to burn characters onto paper. Receipt printers print receipts and cannot print labels. Label printers print labels and cannot print receipts.
If receipts are to be printed on 8.5" x 11" paper, leave the dot in 'Ink Printer'. The first printer set in 'Ink Printer' will be used.
Thermal Receipt Printers are special printers which print 3"-wide sales receipts.
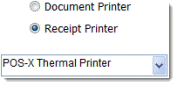
To use a thermal receipt printer, select the printer here and make sure 'Receipt Printer' is selected:
If the printer is not listed in the drop-down menu, install the printer driver (software). (Please refer to the printer's manual and installation CD, the manufacturer's or seller's website, or search Google for 'printer driver' plus the make and model of the printer.)
Copies To Print can be set to print multiple copies of the receipt.
Receipt Printer Settings: Receipt header and text font sizes can be adjusted (setup > printers). The header includes store name, address and phone number. The text can be up to six lines, fewer if there's a 2nd address line, Tax ID, email address and/or web site to be printed.
The store name and address can be printed on receipts by checking 'Include store name and address in receipt header'. (If the store name is too long, shorten it here in Program Setup on the General tab.)
3. Label Printer
Thermal label printers cost more but they don't use ink cartridges and thermal labels cost less than sheet labels. It is much easier to print thermal labels and there is a wider variety of labels that can be printed, including a 2.5" x .5" jewelry label, a two-part hang tag and several adhesive labels and non-adhesive hang tags in various sizes.
BCSS Diamond or Virtual supports thermal label printing with TSC. Zebra printers can be used but they are not supported or recommended.
If the printer is not listed in the drop-down menu, install the printer driver (software). (Please refer to the printer's manual and installation CD, the manufacturer's or seller's website, or search Google for 'printer driver' plus the make and model of the printer.)
Font Size can be changed for the stub of a 2-part tear-off label and for the body of any label:

Check the box if the Zebra 2824 or TSC 225 printer is being used.

Thermal Tag Sizes
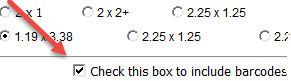
Choose the SIZE and TYPE of label that matches the label loaded in the printer. Click Save/Exit. Close the program and restart it to make sure the change takes place.
Please note: Most often, when labels are not printing as expected, labels in the printer don't match label settings. Note that there are both adhesive and non-adhesive tags in size 2.25 x 1.25.
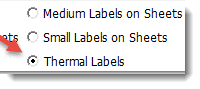
Also, the number 1 reason why labels don't work is because 'Thermal Label' on the Labels Screen (not here in Setup) is not selected:
Check the box if barcodes are to be printed on labels.
Click Save to save settings and continue in Program Setup:
Click Save/Exit to save settings and exit Program Setup:
Close/reopen the program and view this page again to make sure the changes were saved. If they weren't saved, Windows' 'User Account Controls' are blocking. See this video to correct the issue.
Select the Sales Tab. 
Buyer Information (Diamond and Virtual)
Check 'Automatically enter 'Cash Sale' for Buyer Name' if 'Cash Sale' is to be auto-entered for the Buyer Name for each new sales invoice, or check 'Manually enter Buyer info on Sales Invoices' if customers' names and addresses are to be entered on new sales invoices (and saved in the program).
If Buyers names and addresses had been collected previously, click this button to have that information transferred to the Buyer Work Area:
Buyer 'Pick List'
Check this box to have a list of buyers presented when a sales invoice is opened.

In practice having a list pop up with each completed sale can be more of an annoyance than a convenience. Uncheck the box to prevent the list from appearing.
The Buyer Work Area may be hidden by removing the check from the box named 'Show Buyers Work Area'.
In BCSS Diamond and BCSS Virtual check 'Enable Rewards' to activate the Rewards Program and enter the amount of reward to be granted in decimal format (.1 = 10% e.g.).
Sales Taxes
Set the Sales Tax description(s) and amount(s). To disable tax collection, set the rate(s) to zero. Tax computation may be disabled by selecting 'Tax-Free' when completing the New-Sale Screen (F6).
Any inventory category can be 'tax free', taxed at a higher/lower amount (than the default rate set here), or tax-free up to a designated amount. For example, in New York clothing below $50 is not taxed. The rate above $50 can be set. (See tax free and tax exempt.)
Check 'Always round taxes up to the next whole cent' if applicable. If sales-tax totals for a given period differ in reports by a few pennies, this 'rounding' may be the cause.
Check 'Round pennies Canadian style' or 'Amounts paid by Client Credit are tax free' if appropriate.
Invoice Header and Footer
Headers and Footers are text which can appear on a letter-size sales invoice. These are text files (header.txt and footer.txt) which can be edited to suit shop requirements. By default they are located at (C:\BCSS). The can be opened in any text editor (Notepad, Wordpad), edited and changes can be saved. The changes will appear on the invoice when the invoice is next printed.
The height of the header and footer is set at .55" and can be adjusted here.
Touchscreen Monitors
Check 'Use Touchscreen For Sales' if a touchscreen monitor is to be used at POS. This will cause all text and buttons to appear larger.
Cash Drawer
If a receipt printer is not being used, the cash drawer can be connected directly to the PC (using a special adapter included with the drawer) and opened in BCSS by pressing F12 or the UP arrow (depending upon the BCSS version). Set the COM port here for the drawer.
Buyer Fee and Credit-Card Options
A 'Buyer Fee' is an amount deducted from sales proceeds before applying other deductions and the Consignor %.
There are also two credit-card options:
- Set a percentage to be deducted from all settlements of credit-card sales before applying the Consignor %.
- Where allowed by law, set a % to be added to all credit-card sales.
These options do not appear by default because they are optional and fee based ($19.95/month).
Select the Networks Tab
Setting up a functional Windows network is required before using BCSS on the network. A local experienced network technician is needed to install commercial-grade equipment (NIC cards, dual-band router, cat 6/7 Ethernet cables) and verify functional connections between all computers. Please refer the technician to the Network section in this manual.
For BCSS purposes 'networking' is reading from and writing to the same database.
Here in Program Setup, on each computer, the location of the database must be set. By default the database will be on the C: drive of the host computer in the BCSS folder (C:\BCSS). On remote computers click the 'Find' button and navigate to/select the BCSS folder on the host via the network.
Skip proxy server.
On each computer on the network, the location of the database must be set on this page. By default the database will be on the host computer in the BCSS folder (C:\BCSS) and must be shared. On remote computers click the 'Find' button and navigate to and select the BCSS folder on the host. The listing for the BCSS folder on the host will look something like \\myhostcomputer\\bcss. If the listing is not present the BCSS folder on the host is probably not shared.
Manage Locations
- The program needs to know about each computer on the network. Click on Manage Locations. In the table in the first cell, enter a name for the computer housing the BCSS database. Common names are host, server, main...
- Enter names for other computers on the network (POS1, POS2, Remote1, Remote2, etc.)
- Save/Exit.
- Close/reopen the program to reset Windows.
Manage Inventory Locations
Select the Mall Tab. (Diamond and Virtual) 
Check applicable options at the top of the page:

- Widen the screen to see all columns.
- Widen each column if necessary.
- For each space, enter the name of the space (not the person renting the space).
- A description is optional.
- Select the name of the occupant from the drop-down menu.
- Enter the amount of rent (weekly or monthly).
- Enter the date of the last rent paid.
- Enter the name of a person 'waiting' for the space, if any.
Click Save to save settings and continue in Program Setup:
Click Save/Exit to save settings and exit Program Setup:
Close/reopen the program and view this page again to make sure the changes were saved. If they weren't saved, Windows' 'User Account Controls' are blocking. See this video to correct the issue.
Search Options
Key-Press Search: Under each work-area table, entering letters or numbers will reduce the listings in the table to only those records matching the letters or numbers entered.
Configure Search
Click on File then User Interface

On this page, make a selection for each of the following options:
- In the Buyers, Clients and Employees areas, select Name or ID.
- In the Disbursements area, select Paid By or Paid To.
- For Inventory, ID1, ID2 or Description. (For searches by description to be useful, there must be consistency in how items are described. If two items are black in color and one is listed as 'black' and the other is listed as 'blk', typing '(bl' will find both (and every other item with 'bl' in its description) while 'blk' will only find 'blk' and not 'black'.)
- Sales: Invoice # or Name
- Settlements: ID or Name
Search can be by first letter or number, or search can find the string of characters entered in the search box anywhere in the name, description, ID, etc.
Inventory Search
In the Inventory Work Area, click in the search box and scan a barcode to locate the item record.
BCSS Performance
The print-preview screen can be turned off so previews of print jobs will not be presented when printing reports and full-page receipts. This does not apply to 3" thermal receipts.
Local Backup
The program will automatically back up data to 'C:\bcss data do not remove' each day at the time set in Program Setup at the bottom of the General page. A different location can be set by clicking on Find File and pointing to the location to where backups should be placed.
Preferably backups should be made on an external storage device (like a flash drive) to avoid losing data to computer issues.
This concludes setup for BCSS. The demo is fully functional and can be used to run your business.
Try entering real transactions for a week or so to test. All data entered will be saved unless the program is reinstalled or a different database is restored.
Backup data before uninstalling BCSS, otherwise data will be lost. Managing Data is a must read! Place someone in the store in charge of backing up data frequently.
To erase test date, click on Utilities (upper right in BCSS) and select Restore Data. Click on the image to close the warning screen. Navigate to 'C:\BCSS\blank db'. Select it and click Save.
Quick Start
1. Disable User Account Control (UAC)
- Search for "Change User Account Control settings" in the Windows search bar.
- Move the slider to the lowest position ("Never notify").
- Click "OK" and restart your computer.
2. Load Sample Data
It may be helpful at first to see how data is displayed in the program. Sample data may be loaded then removed when you're ready to enter actual store information and data.
- Open the BCSS software.
- Navigate to Utilities (upper right in the program).
- Select Restore Data.
- A warning will appear regarding overwriting previous data. Click on the image to close the warning.
- On the ensuing screen click on Local Disk (C:). (Scroll to locate it.)
- Double click on the BCSS folder.
- Select 'sample db'.
- Click Save.
- Click on View All in BCSS (center right).
It may be helpful to 'split' the monitor with the program on the left and the user's guide on the right.
The steps below are for BCSS Deluxe, Diamond and Virtual. Please see Intro Quick Start for Intro.
Key Features
Deluxe, Diamond and Virtual can transact in consignment, buy outright (purchasing from individuals and reselling), layaway, merchandise rental, retail (reselling inventory on hand and purchases from businesses), space rental and store-credit sales.
For consignment, buy outright and rental, create a client record for each client or seller and select the appropriate option for entering items on the new-client screen:


For retail create one or more client records for the shop, flag them as 'This is a House Account' and use Batch Retail to enter purchased items.
A 'shop account' is embedded in the program. It records and reports on all activity.
The 'Transfer Account' is only used to receive ownership of unsold inventory where:
- The client has elected that option (instead of donate, destroy or return to owner).
- The client record has 'Transfer to House' as the 'Unsold Items' option.

- The Transfer Account is activated (Program Setup > Clients).

10 Simple Steps to completing a Consignment Sale:
| 1 |
Run Program Setup Enter shop Information & tell BCSS about your business, including which printers to use. |
|
| 2 |
Add a Consignor (F2) Enter as much or as little information as you. Mark records to receive mailings. Set consignor %, what to do with unsold items... |
|
| 3 |
Print Agreement Press a button. BCSS auto-fills the Agreement with shop/consignor information - then print! |
|
| 4 |
Add Inventory Category Your shop's inventory is neatly sorted into categories that you define. |
|
| 5 |
Add Inventory (F3) Add items one at a time or use Batch Consignment and Batch Buy Outright. |
|
| 6 |
Print Price Labels Click on Labels then click Inventory. Make settings to print labels only for desired items, or print from batch-enter screens. |
|
| 7 |
Make a Sale (F6) Press F6 to open the New-Sale Screen (Invoice). Select items from an inventory list, manually enter unlisted items or read barcodes. |
|
| 8 |
Make a Settlement (F7) Settle for one Consignor or use Batch Settle to process several settlements at once. |
|
| 9 |
Pay the Consignor Use the New Disbursement option in the Disbursements menu to prepare and print checks or make other types of payments. |
|
| 10 |
Create Reports Click Reports and choose a report type. Make settings on the Report Screen to include only desired information. |
|

Update the Software
Every software program is a work in progress, keeping up with changes in technology, adding new features, squashing bugs... Updating BCSS fixes known issues but updating BCSS will not resolve issues with data, malware and other software programs (like Windows and printers).
- Use Internet Explorer or Edge and download your BCSS edition:
Update Intro Update Deluxe Update Diamond Update Virtual - Click the down arrow to the right of Save and select Select 'Save as'.
- Navigate to the C: drive.
- Select the folder named BCSS.
- Click Save.
- Choose to overwrite the existing file.
- Reopen BCSS and test for the issue.
- Not resolved? Send an email to BCSS Support.
BCSS Virtual Edition
Virtual Online Features
BCSS Virtual automatically uploads your clients' data online to resell4.me where clients can view their account information (on computers and mobile devices) and enter inventory (which can be downloaded at the shop for editing, labeling and adding to inventory).
To keep online data to a minimum and relevant, the program only uploads data for the past 60 days or 'year-to-date', whichever is greater.
 When a webpage is revisited, the browser cache retrieves stored information from the hard drive to speed up loading times. However, if data on resell4.me has been updated (with new data uploaded to replace the old), the browser might still display outdated information from the cache. To avoid this, users should be instructed to hold down the Shift key and click the refresh button (the circular arrow on the browser toolbar) or regularly clear their browser cache.
Settings - Client Records
- For each client (vendor) who is to have online access, edit his or her record and check 'Allow Online Access'.
- It is no longer necessary to assign a password to each client. All clients will use the password recorded in Program Setup > General (Store ID).
- (If police reporting is activated look for 'Allow Online Access' on the details page on the new-client screen.)
- To mark several records without having to edit each one, backup the data and export client data. Place 'T' in the column (AX) named 'Online'. If all are to have online access, enter 'T' in column (AX) on the first row and use drag/fill to fill cells below the first cell, or ask tech support to flag the records for you.
- Save the changes and import consignor records.
- Spot check records to confirm that records of vendors who are to have online access have been flagged correctly.
Program Settings - Client Records
Manually Upload to resell4.me
Update one client record: Select the record in the Clients Work Area, right click and select Update Online.
Update all clients: In BCSS under Utilities press the last entry: 'Upload Inventory + Clients to Server'.
Consignor Access to Resell4.me
Consignors use their BCSS Internal IDs (different from Client IDs) to access resell4.me. A list of Internal IDs may be viewed by using 'Export Clients' under Utilities in BCSS. Open the exported file in Microsoft Excel or a similar program and view column V.
To log into resell4.me, your client will:
- Get the Internal ID from you.
- Go to https://www.resell4.me.
- Enter his/her Internal ID (assigned by BCSS, not the Client ID that was assigned by the person creating the client record).
- Enter the shop's Site ID (displayed in Program Setup > General).
- Enter the password displayed in the client's record (which may be different from the password in program setup on the general tab).
- Click on Submit.
If you would like to preview resell4.me now, go to https://www.resell4.me and enter 1 for the User ID, 1 for the Site ID and consign for the password.
Add Inventory Online
Vendors, shop owners, employees or anyone granted access to resell4.me can enter inventory on resell4.me to be downloaded at the shop:
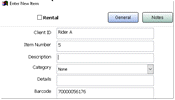
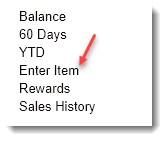
- Once logged onto resell4.me, look for 'Enter Item' at the lower left of any screen.
- Enter the item's price, description and quantity. 'Details' are optional.
- Enter the store's password.
- To add another item, click on Next.

- To go to a previous item (after clicking on Next), choose 'Prev'.

- After all items have been entered, click Submit.

Download Inventory at the Shop
Make a backup of the database before downloading data and restore the backup if the download didn't produce a desired result.
- Go to Utilities (upper right in the program).
- Select 'Download New Inventory'.
- Adjust the screen size if necessary.
- Entries can be edited.
- Price labels can be printed.
Note: Once inventory has been downloaded to this screen, the items are removed from resell4.me and cannot be downloaded again. Best practice may be to save the downloaded items first then edit them and print labels using 'Batch Edit Items'.
Make Money with This Feature
- Fewer phone calls for "What has sold?" and "How much do you owe me?" - a cost savings
- More time for more productive activities
- Deduct a small monthly fee from settlements for those who have online access. Your clients already love their cell phones so 'sell them' on the idea of viewing their account information on their favorite devices.
- Any one consignor or vendor can be excluded.
- The fee would not apply in a month of no sales per client.
The monthly server rental is $25 so anything collected over that amount is store profit.
Some vendor malls collect $5 per month per vendor. You might 'poll' your client base to determine their level of interest and willingness to pay for the feature.
There are two ways to collect the monthly fee:
- Add the monthly amount to the rent amount (in Program Setup > Mall), or
- In BCSS go to File then User Interface, check 'Charge Online Access Fee', enter the amount then use Save/Exit. With this method, each settlement document will deduct the amount from settlement of sales and enter a note of the deduction on the settlement printout for the vendor. For a vendor not paying the charge, in his/her record check 'No Fee for Resell4 Upload'.
Acquiring the Feature
For current BCSS clients who do not have BCSS Virtual, it would be necessary to upgrade to BCSS Virtual. Any previous payment(s) for software will credited in full toward the upgrade to Virtual ($795).
For current owners of BCSS Virtual, please email support or call 888-427-5779 to activate this feature.
Client Data Not Correct on Resell4.me
- In Program Setup > General, are the Store ID and password those provided by support? Look closely at the numbers and spelling. Enlarge the screen if necessary to clearly view the contents of the fields. The word 'consign' is often misspelled or changed to something else.
- Check settings in User Interface.
- Go to File then User Interface.
- If auto upload to resell4.me is to be used, check these 3 options and note the time:

- At the time set, BCSS must be open.
- Save/Exit.
- Edit the client record.
- Check 'Allow Online Access'.
- The Internal ID is to be used for logging into resell4.me. (This is not the Client ID which is different.)
- Enter a password. Use lower case, no punctuation. (Give everyone the same (short) password for simplicity.)
- Save/Exit.
- Manually update client record on resell4.me.
- RIGHT click on the client record.
- Use 'Update Online'.
- Wait for confirmation of the update.
- Confirm the Store ID in Program Setup > General.
- Go to resell4.me (or use the link under Help in BCSS.)
- Enter the correct log-in credentials (Store ID, User ID, Password).
- Clear Browser or device cache.
- Android browser: Go to Menu > More > Settings or Menu > Settings > Privacy & Security. Chrome: Go to Menu > Settings > Privacy.
- Android browser: Tap Clear cache, Clear history, and Clear all cookie data as appropriate. Chrome: Tap Clear browsing data at the bottom of the screen, leave the defaults selected (browsing history, cache, and cookies), then tap Clear.
- iOS - From the home screen, go to Settings > Safari. Toward the bottom of Safari's settings screen, tap the button for Clear History and Website Data, then tap Clear History and Data to confirm.
- Fire tablets - Tap Silk Browser to open the web browser.Go to Menu > Settings > Privacy. Tap Clear browsing data. Make sure Browsing history, Cache, and Cookies, Site data are selected. Tap Clear.
Troubleshooting Printers
The following step-by-step instructions are offered to help avoid having to pay anyone (including us) for help.
There are 3 software programs involved in the print process: BCSS, Windows and the printer. Our program sends print instructions to Windows which relays the print job to the printer. All 3 must be working properly to print successfully.
When any print job fails, it's likely that Windows or the printer needs help, not BCSS, so please follow these steps (to avoid a service call):
- Maybe 3 of 4 print issues are resolved by turning the computer and printer off and back on. (full shutdown - not a 'restart')
- Fast check of the printer: Go to the Control Panel > Devices and Printers and self test the printer. For help with a self test, search for the printer make/model and append 'self test' to the search phrase.
- Is the printer on?
- Paper loaded? Correctly?
- Out of ink? Ink head burned out?
- Connected? (Check both ends. Try a different USB port. They 'go bad'.)
- Old printer? Used? Refurbished? Maybe 'end of life'...
- Are there red and green lights on the printer? Green: good. Red: bad. Turn off and back on.
- If the printer self tests successfully, in BCSS program setup on the printers page, check the printer settings for ink, receipt and label printers. Reset them if necessary and use Save/Exit.
- BCSS asks Windows to remember the correct printers for each (ink, receipt, label) but Windows updates and other factors cause Windows to 'forget'. Also, in the control panel, go to User Accounts and turn User Account Controls off. (video)
- If the printer does not self test successfully, call printer support: POS-X 800-790-8657, or search for the printer make and model and append 'support' in the search parameters. (The printer must function on its own before using it with BCSS.)
- Once the printer self test is working, go back to step 8.
When all else fails please call on us to help. 888-427-5779. The minimum charge is $39 - about 1/3rd that of local IT support.
Training Videos
Copyright © 2025 All Rights Reserved By Best Consignment Shop Software